
Integrating GitHub Actions + ELK into bug bounty
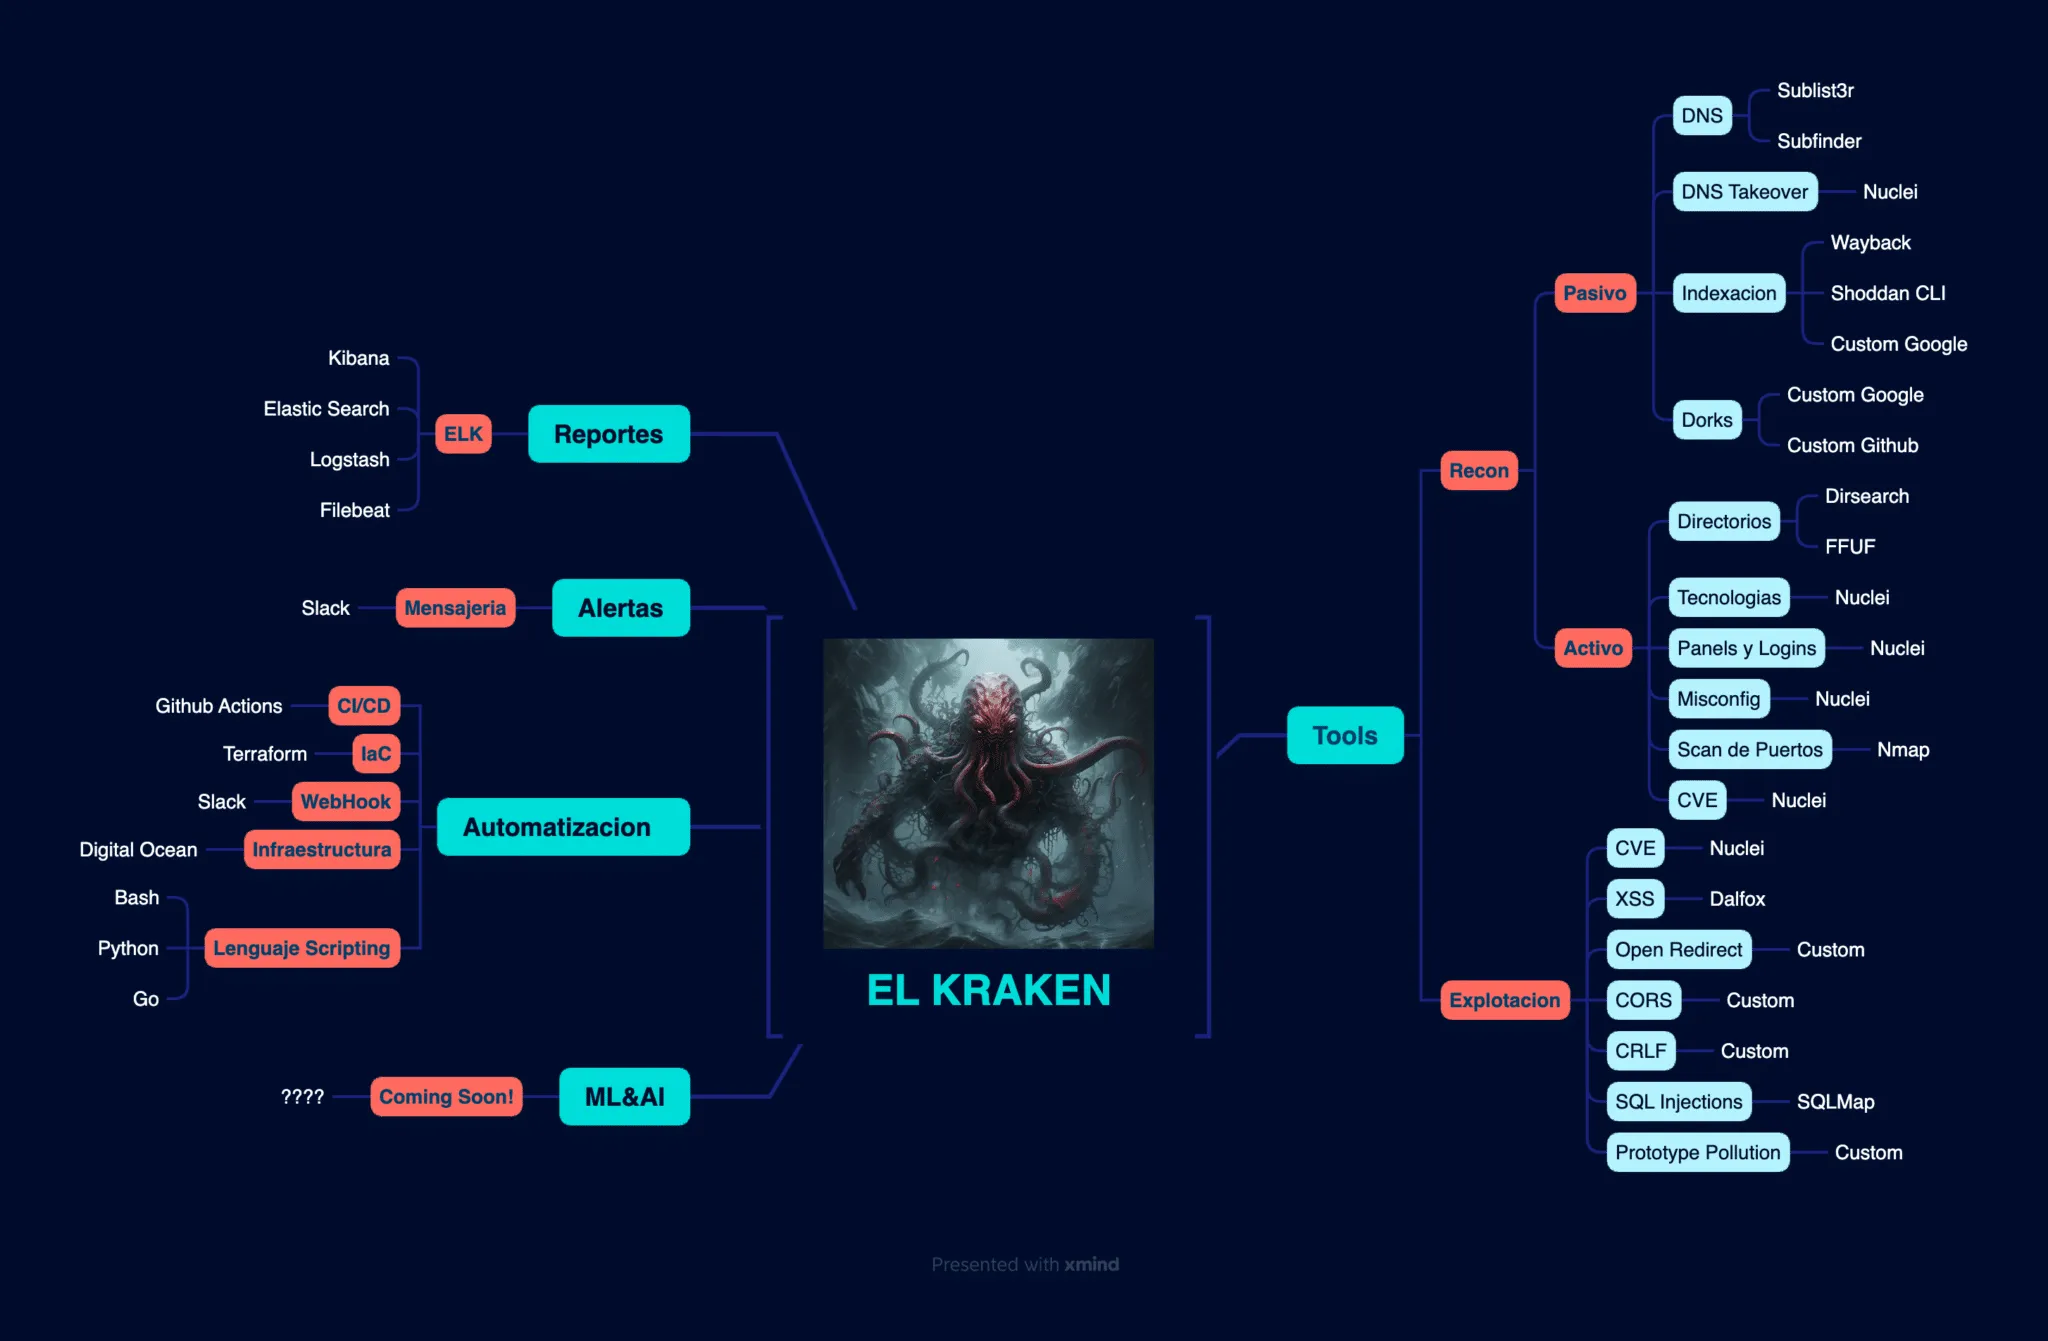
GitHub Actions is used as the trigger for infrastructure as code, spinning up on-demand scanning servers in DigitalOcean, running El Kraken and tearing them down afterwards. Results are shipped over SCP to a permanent ELK server where Kibana charts historical and real-time metrics for every scanned target.
Two different tools, one pipeline
GitHub Actions and ELK (the Elasticsearch stack) are tools with completely different purposes that, with a good implementation, can help us enormously to complete any automated process end to end.
GitHub Actions is a powerful tool for deploying code through a CI/CD methodology. In this post we are going to give it a different job: the starting point of our automation, deploying infrastructure as code (“IaC”) to instantly bring up our servers along with the tooling we need for bug bounty.
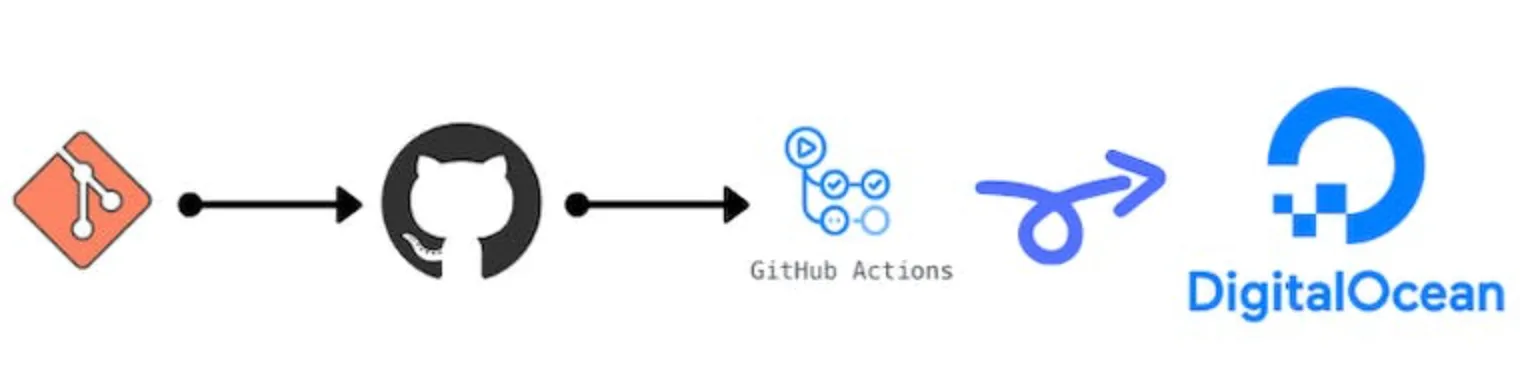
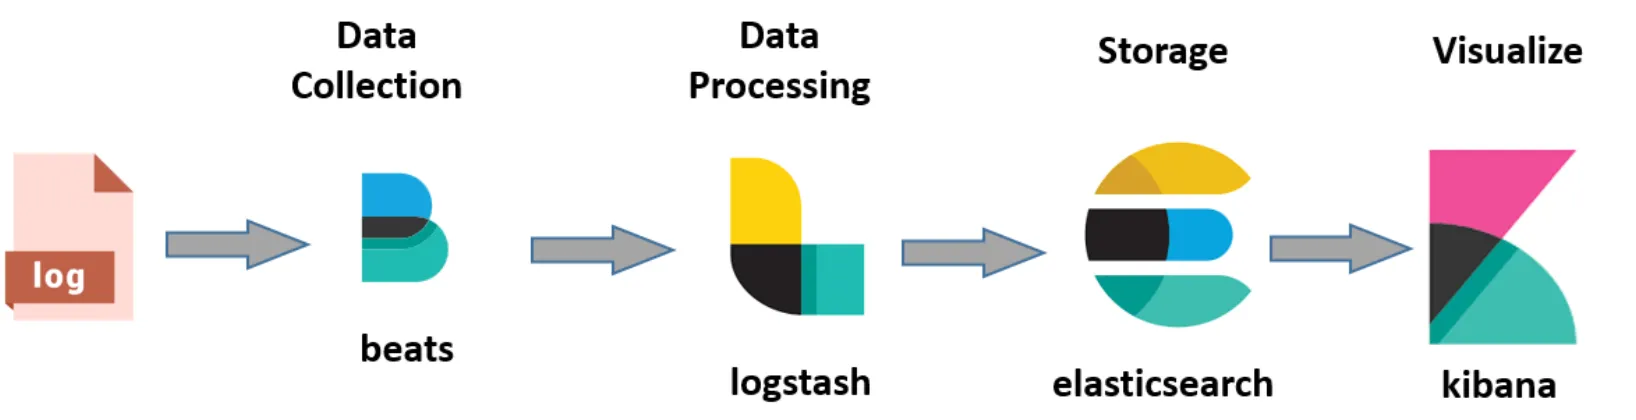
On the other side we have ELK, which is used to collect metrics and build historical and real-time reports. In our case we want metrics and reports for every automated scanning process we run against each target, so we can review them later and keep track of our hunting process.
Step 1: prepare the repository
After this intro, let’s get to work integrating it with our tool El Kraken, which I already covered in a previous post.
The first thing to do is download the Deploy_ElKraken repository, create a free GitHub account and push our copy of the repository with private visibility. That last part matters for security: it avoids exposing a key we are going to need later on.
Once that is done, follow the steps described in the README.md file inside the repository. Following them configures all the secrets and environment variables the implementation needs.
Step 2: the first run
With everything configured, to trigger our first run we only need to change the droplet.tf file, at line 49, replacing the example domain:
echo vulweb.comwith the domain we want to scan. We commit the change and that starts the GitHub Actions workflow, which triggers the server deployment on DigitalOcean and kicks off the scan.
Step 3: add the ELK module
What if we want to add the ELK module? The first thing to understand is that this module is an add-on that runs on a separate server and needs to be permanently available, which creates fixed monthly costs you have to plan for.
My recommendation in these cases is:
- Bring up a service running Elasticsearch and Kibana.
- In the scanning service (El Kraken), set in the configuration variables which server the results will be sent to: the ELK server, or a file repository the results can be shipped to over SCP.
- Configure the corresponding SSH certificates so that SCP connection between the scanning server and the file repository used by ELK can be established.
- Configure the dashboards we want charted in Kibana.
With all of this in place we have an end-to-end automated tool that makes our hacking and bug bounty processes easier.
I hope you find it useful. I am available through social media for any extra information you may need.
Happy Hacking!
Keep reading
How AI is changing the rules of bug bounty
AI applied to bug bounty is no longer futurism: it speeds up recon, prioritises findings and drafts reports. Real use cases, hard limits and concrete risks.
Bug Bounty Tool: El Kraken
El Kraken is a modular bash tool that automates recon and known-CVE exploitation end to end, chaining nuclei, subfinder, wayback and dirsearch together.